Pies and tarts come in a delicious range of flavours, textures and styles. While it takes practice to get the hang of pastry making, it’s not hard—and the results are versatile and crowd-pleasing. You can fill pastry with almost anything, sweet or savoury, and can shape and decorate pies and tarts in a variety of ways. Even if you’re not crazy about rolling out pastry dough, there are plenty of easy nut, crumb and no-bake crust options that can unleash your creativity. Here’s the lingo you need to know and our best tips and tricks to help you perfect your pie-baking skills.
Know the Lingo
À la mode: Pie served à la mode is pie served with ice cream.
Blind baking: The technique of baking an empty pastry shell. Some are fully baked to hold separately prepared or cooked mixtures (think banana cream pie). Others are partially baked before filling with liquidy mixtures such as custard, to ensure a crispy (not soggy) crust forms underneath. To blind bake, place raw pastry dough in a pie plate then cover with foil or parchment paper and fill with pie weights (or dry beans or rice) before baking. This keeps the shell from shrinking and prevents bubbles from forming. If you do spot a bubble, just pop it with a fork.
Cookie (or crumb) crust: A mixture of crushed wafers, gingersnaps or graham crackers and butter or oil—and sometimes sugar or seasonings—pressed into a pie plate and baked until firm. Creamy pies often have cookie crusts.
Double-crust pie: A pie with both a top and a bottom pastry crust.
Free-form pie (galette): A pie made without using a pie plate. A filling is spooned over rolled-out pastry, leaving a border. The border is pulled up and over the filling to partially cover it, creating a relaxed, irregular edge.
Glaze: A sugar-based topping, such as melted jelly, brushed or poured over pies to make them glossy.
Lattice-top pie: A pie topped with a woven lattice of pastry strips. See Make Your Pie Beautiful for the how-to.
Meringue: A whipped egg-white topping baked atop a pie until golden. Sugar is usually beaten into the whites to add sweetness and to keep the peaks stable and firm.
Press-in dough: A soft, egg-rich, buttery tart dough that is pressed directly into a pan rather than rolled. It bakes up sandy and crumbly, like shortbread.
Single-crust pie: A pie with only a bottom pastry crust.
Streusel: Also known as crumble, a crumbly mixture of cold butter, sugar and flour that is sprinkled over pies to create a crunchy topping in place of a top crust.
Tarte tatin: An inverted pie made in a skillet with the filling cooked on the bottom before a crust is draped overtop and the pie is finished off in the oven. Once cooled, a tarte tatin is turned out onto a serving platter with fruit facing upward.
Dos and Don’ts for Better Baking
These tips and tricks will make your baking even better.
Ingredients and tools:
Do: Use a mix of fats. Butter gives pie pastry an irresistible taste. It also contains a fair amount of water, which can cause gluten in the flour to develop, calling for a soft touch to avoid an overly dense crust. Combining butter with less-watery lard or shortening makes pastry easier to handle and adds tender flakiness to a pie crust. So why not use all lard or shortening? You’ll miss out on that buttery flavour. Experiment with combinations of the two to see where your preference lies.
Do: Invest in glass pie plates. They conduct heat well, and you can see when your bottom crust is perfectly golden brown. Metal pie plates yield nice, crispy crusts, but you can’t check to see if they’re done all the way through.
Don’t: Bother with fancy gadgets. You need just basic baking equipment to make pies and tarts. Even special pie weights aren’t necessary for blind baking; just line the pie shell with parchment paper and fill with dried beans—they’re the perfect size and cost almost nothing. (Just don’t try to cook and eat the beans afterward!)
Don't: Use packaged crumbs. Crush graham crackers or cookies yourself to make cookie crusts—they’ll taste fresher. Pulse in a food processor until crumbly (not dusty) or pack in a resealable plastic bag and crush with a rolling pin.
Making pastry:
Do: Keep fats cold as you work. This is one of the keys to flakiness. Cold fat melts and creates steam as the pastry bakes—this raises the flour into those crispy layers. Many recipes have you add ice water as the liquid that brings the pastry together because it keeps the fat chilled.
Do: Leave some larger pieces of fat. When you cut fat into flour, you want larger pieces among the crumbs—some as big as a green pea.
It’s tempting to cut everything to an even texture, but stop when the mixture still looks slightly uneven to make sure lumps of fat remain.
Don’t: Avoid machines. A food processor is a fine tool for making pastry. Add cold fat in batches and pulse, pulse, pulse; if you keep the machine whirling, you’ll end up with a gluey mixture. Watch carefully and stop while you can still see some pea-size pieces of fat.
Don’t: Overhandle pastry. Pastry is just right when it looks not quite finished. Use a light touch when stirring in liquid, and don’t worry if you have crumbly bits surrounding your ragged dough. Gather and press it all together gently into a disc (or two for a double-crust pie). Avoid the temptation to knead—this will build the gluten and make a tougher crust. Wrap the disc of pastry in plastic wrap and chill in the fridge so it firms up while you make the filling.
Fillings and thickeners:
Do: Use a fine-textured thickener. Both flour and cornstarch are great at thickening the juices in a fruit pie. Instant tapioca works too, but those tiny pearls can create a gritty texture. The solution: purée the tapioca in a food processor until it’s powdery before adding to the fruit.
Do: Toss in an apple. Apples are high in pectin, a type of fibre that helps jams and jellies set. Grate a sour apple and add it along with your preferred thickener to a juicy berry pie filling to help boost the gelling action.
Don’t: Overdo it on the thickener. More than a tablespoon or two of cornstarch or tapioca can give your pie filling an unappetizing jelly-like texture. The exception is when using frozen fruit (see below).
Don’t: Avoid frozen fruits. Fresh berries, sour cherries and peaches are in season only briefly, but good-quality frozen versions can work as stand-ins. The key is to deal with the extra water they contain, which can make fillings runny. One option is to use the fruit straight out of the freezer and increase the sugar and thickener a bit; there’s no hard-and-fast rule on proportions, so just toss fruit with an extra spoonful or so of each. Alternatively, thaw and drain the fruit well before adding the other ingredients.
Rolling, cutting and patching:
Do: Roll between paper. Soft, buttery tart and pie doughs can stick to your rolling pin and work surface. The solution: roll out dough between two large pieces of flour-dusted parchment or waxed paper. Periodically peel off the paper and check to see if the pastry adheres to it; if you need to, dust the pastry with a little more flour and re-cover with the paper before continuing to roll.
Do: Patch as you go. When you’re rolling or fitting pastry into a pie plate, you may end up with a small hole. Luckily, that’s easy to fix. Don’t pinch the seams together; this thins the dough and can worsen the problem. Instead, grab a pastry scrap or break off a ragged edge and gently press it into the hole to fill it.
Don’t: Get too hot. Heat makes pastry harder to roll and cut cleanly. If your pastry starts to slump in the heat, or gets sticky and hard to handle, refrigerate it for up to 30 minutes before trying again.
Don't: Over-roll. Rolling back and forth over the same spot can make pastry tough. Instead, roll outward from the centre of the pastry disc, lightening the pressure toward the edge to keep a uniform thickness. Turn the pastry a quarter-turn. Continue rolling and turning in the same direction until you reach your desired thickness or diameter.
Baking:
Do: Use a baking sheet. Sliding a rimmed baking sheet under a pie or tart as it bakes serves two purposes. First, the metal directs heat to the bottom crust to ensure a golden brown finish. Second, the sheet also catches any juicy overflow and keeps it from making a charred mess on your oven floor.
Do: Shield the edge. Check a baking pie or tart periodically to see how the edge of the crust looks. If it’s already deep golden too early in the process, place a pie shield or strips of foil over the edge to deflect the heat and keep it from burning.
Don’t: Just watch the clock. Baking times in recipes are provided as a helpful guideline. But since no two ovens are the same, odds are your pie won’t be done in exactly the number of minutes specified. Watch for visual signs of doneness, such as a golden crust and bubbling filling, and trust your senses.
Don’t: Stick to one temperature. When a pie has a wet filling, such as custard or very juicy fruit, start baking it at a higher temperature, like 400°F (200°C), to brown the bottom crust quickly and keep it from getting soggy. After 10 to 20 minutes, reduce the heat to the usual 350°F (180°C) or so to finish cooking.
Chilling and freezing:
Do: Let it rest. Once you’ve rolled out your pastry and fitted it into the pie plate, pop it into the fridge for 30 minutes to one hour before filling it. This isn’t always called for in a recipe, but it can really help boost the flakiness.
Do: Wrap it well. If you do a lot of baking, make a big batch of pastry at one time and refrigerate or freeze some for later. Just make sure you wrap it well before putting it in the fridge, even if it’s just for a day or two. A tight covering of plastic wrap will keep the dough from drying out, and prevent strong odours from seeping in (such as onions or garlicky foods).
Don't: Keep it too long. The most important thing with frozen food—including homemade pastry—is to protect it against freezer burn. In addition to wrapping your pastry tightly in plastic wrap, you’ll also want to seal it in a freezer bag and use it within a month to guarantee the freshest flavour.
Don't: Roll rock-hard pastry. To use frozen pastry, let it thaw completely in the fridge before rolling it out. Press the centre of the dough with your finger to check the texture: It should be cool and firm, but not icy and hard (your finger should leave an impression).
Serving:
Do: Be patient. Juicy fruit pies need time to firm up once they’re out of the oven. If you cut the first slice too soon, you’ll end up with a soupy mess on your plate. The same goes for gooey pecan and some custard pies, which set as they cool. For the best texture, let the pie cool completely before you dig in.
Do: Use the right tools. A long, sharp chef’s knife is ideal for cutting pies and tarts. A long, thin pie server is great for dishing up skinny slices of a rich tart made in a large-diameter tart pan; a squat triangular shape works better for pies made in a typical nine-inch (23-centimetre) pie plate. Make sure you cut all the way through the crust so you can lift out pretty, unbroken slices.
Don't: Settle for messy. Usually, that first wedge of pie is a wreck—the filling falls out, pieces of crust get missed and it’s not fit for company. But here’s a trick: cut a very thin wedge and remove it (consider it the cook’s bonus). Then cut the first slice, which should come out cleanly in one piece.
Don’t: Cover the entire pie with whipped cream. A lush whipped-cream topping looks pretty, but skip it unless you’re planning on not having leftovers: the cream can weep and make the crust soggy. A better bet is to add a dollop to each slice as you cut and serve each piece.
Make Your Pie Beautiful

Decorative edges. A fluted edge is a classic finish. To get it, trim the pastry so three-quarters of an inch (two centimetres) hangs over the rim. Fold the overhang under and tuck it between the bottom crust and the pie plate, leaving a small lip. Use your index finger and thumb to gently pinch the pastry together in half-inch (one-centimetre) increments around the lip's outside edge. Alternatively, to make a simple crimped edge, press fork tines into the pastry lip all the way around. Or braid three long, thin strips of pastry, brush with egg wash and gently press onto the rim for a braided edge.

Lattice tops. Woven pastry atop a pie has serious retro appeal. Use a pizza cutter or a fluted wheel cutter to slice pastry into strips—the wider they are, the fewer you’ll need to cover the pie. Lay half of the strips, evenly spaced, over the filling in the same direction. Fold back every other strip halfway; lay a new strip perpendicular to them. Unfold the folded strips, then fold back the alternating strips; lay a new strip perpendicular to them. Keep adding new strips until the pie is covered. Watch and learn how here.

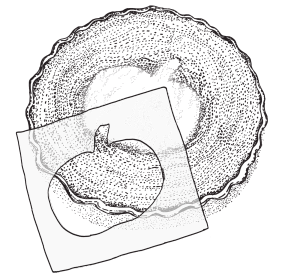
Stencilled designs. You can make your own or use a commercial stencil to form words or pictures atop your pie. For a dark design, sprinkle with cocoa powder or cinnamon before baking. For a snowy look, sprinkle your completely cooled pie or tart with icing sugar.

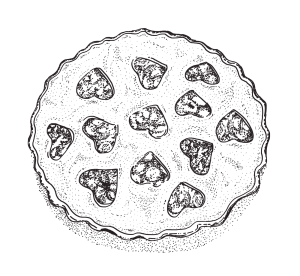
Creative cutouts. Instead of making simple steam vents, cut shapes out of the rolled-out top pastry. Experiment with small cookie cutters, or freehand it with a sharp-tipped paring knife. Hint: The more holes, the more fragile the pastry becomes. Handle it gently to keep from stretching the designs.

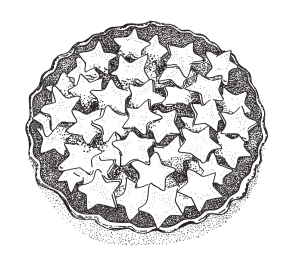
Layered shapes. Use your favourite cookie cutter to cut shapes out of rolled-out pastry. Overlapping as desired, layer the shapes over the filling to create a top crust. Brush egg wash over each piece so it adheres to the one next to it.


